AG Shed Concrete Foundation Built In Milpitas
This project took place in Milpitas and serves as the foundation for a future steel carport. Nothing fancy on the surface, but the details underneath matter — especially when the steel company is coming out to verify all the anchor points and shear footings.
We handled this slab from start to finish. No surprises, no guesswork — just a clean layout, precise digging, the right amount of rebar, and a crew that knows how to work together.
Full Project Photos:
👉https://tinyurl.com/milpitasagriculturalshed
YouTube Video For This Project:
👉 https://bit.ly/milpitascarport
Building a Foundation the Right Way
Layout and Grade Prep
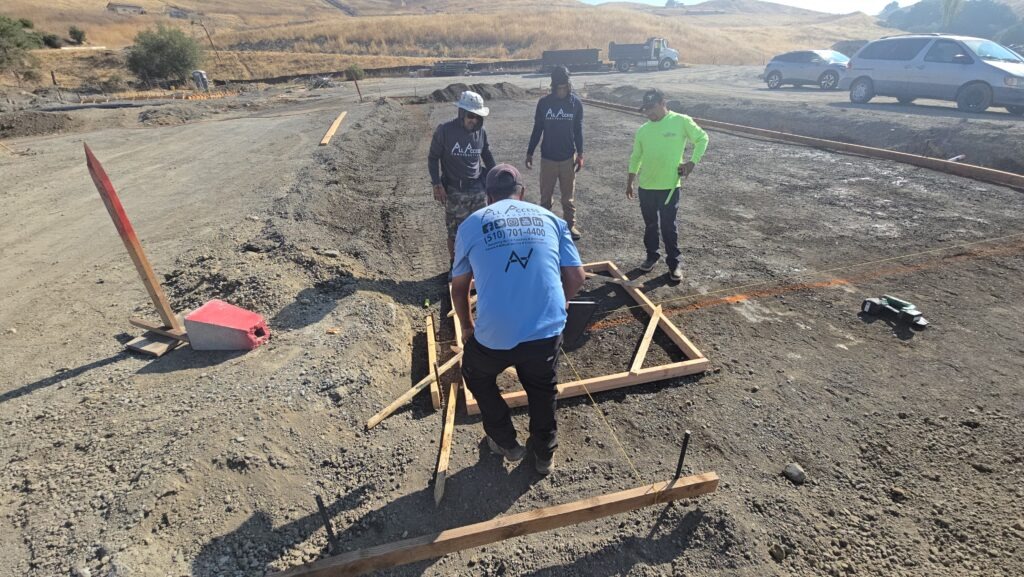
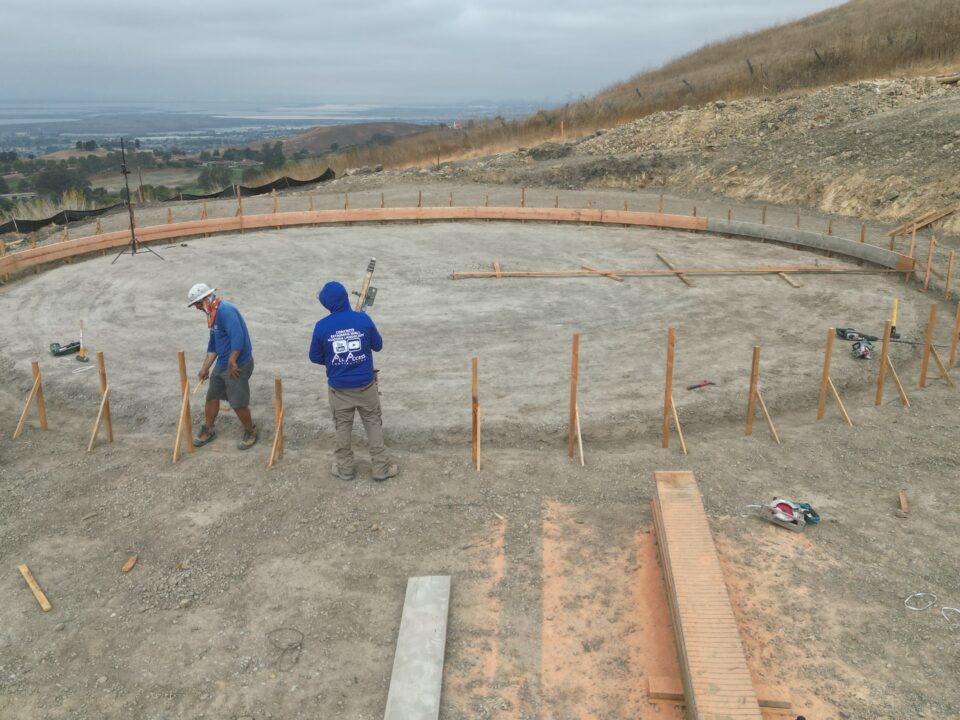
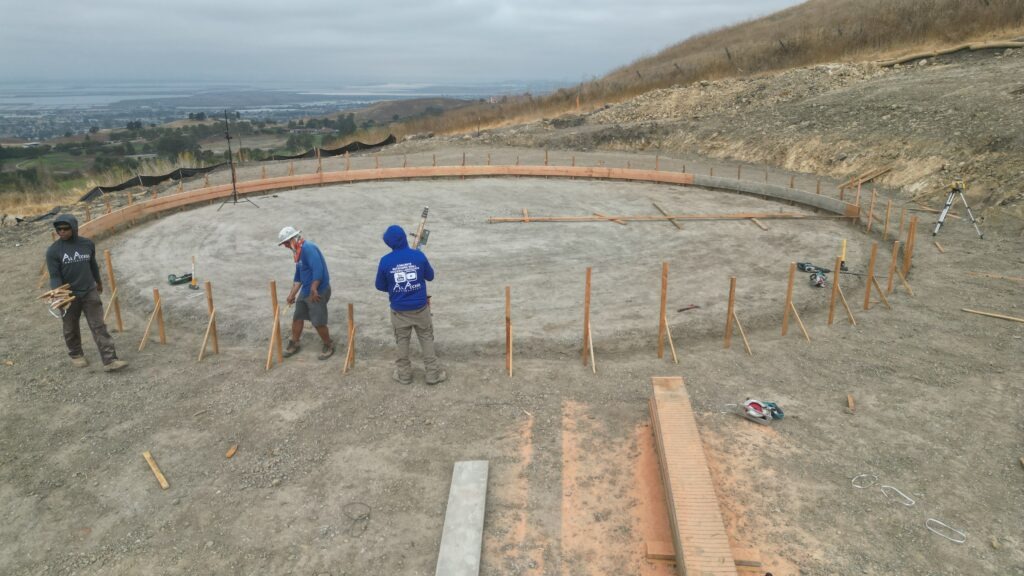
We started by laying everything out ourselves. Whenever we control the layout, things go more smoothly. Less backtracking, fewer surprises, and the slab stays true all the way through.
From the pictures, you can see the guys checking measurements and snapping lines before we even think about forming. This avoids mistakes later—especially when the steel building has specific anchor locations it must meet.
👉https://tinyurl.com/milpitasagriculturalshed
👉https://tinyurl.com/milpitasagriculturalshed
Shear Footings Matter on Steel Buildings
H3: Eight to Ten Shear Footings Installed
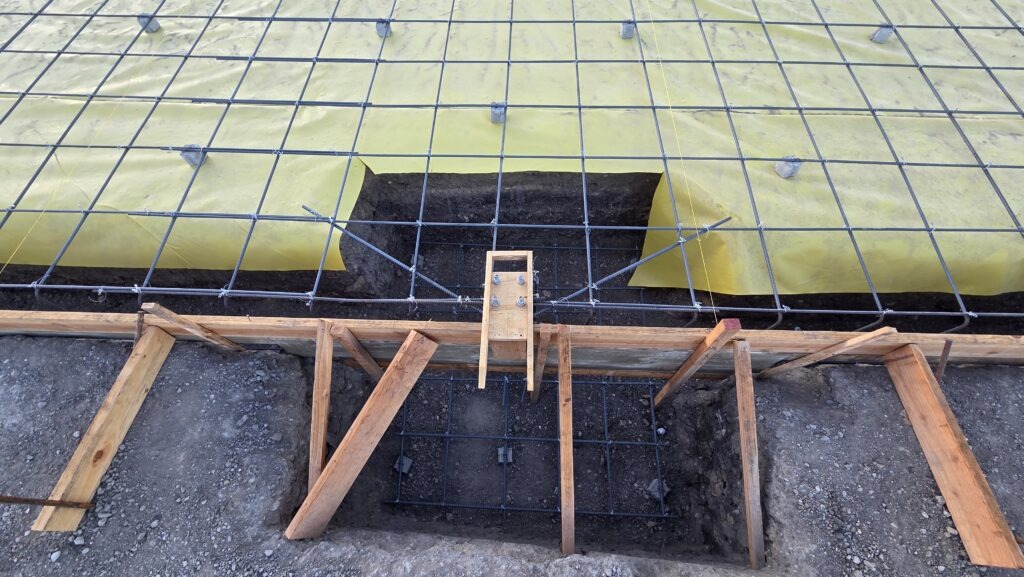
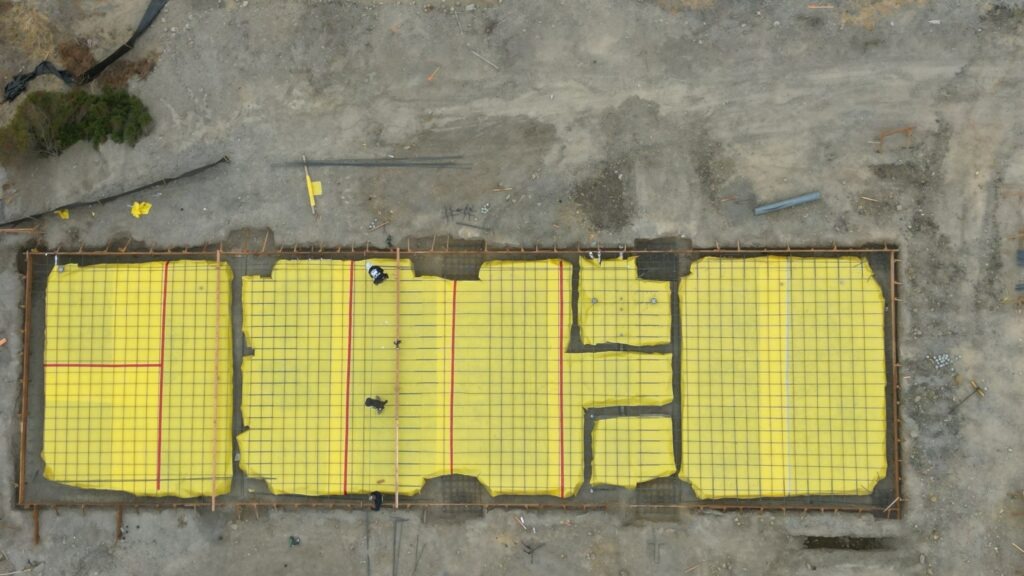
This slab required approximately 8–10 shear footings, each critical to the steel structure on top. These had to be exact, so the steel company sent a representative to verify our measurements before concrete placement.
These footings are deeper with heavier rebar cages. There’s no “winging it” on these — everything goes off the engineer’s plan.
Rebar Setup — 16 Inches on Center
JD’s OCD Pays Off
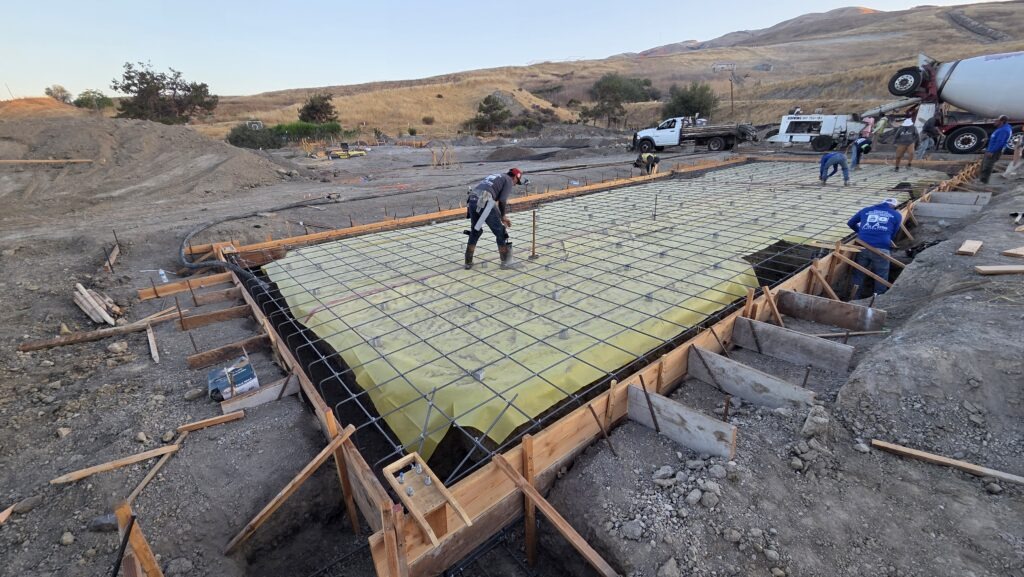
We used #4 rebar at 16 inches on center, tied tight and elevated on dobies.
JD handled the precision like he always does. He’s OCD about it — but honestly, every crew needs someone like that. He’ll check the exact measurement three times before he signs off, and that’s why our slabs come out clean.
You’ll also see the rebar cages for the shear footings — all custom-bent on site.
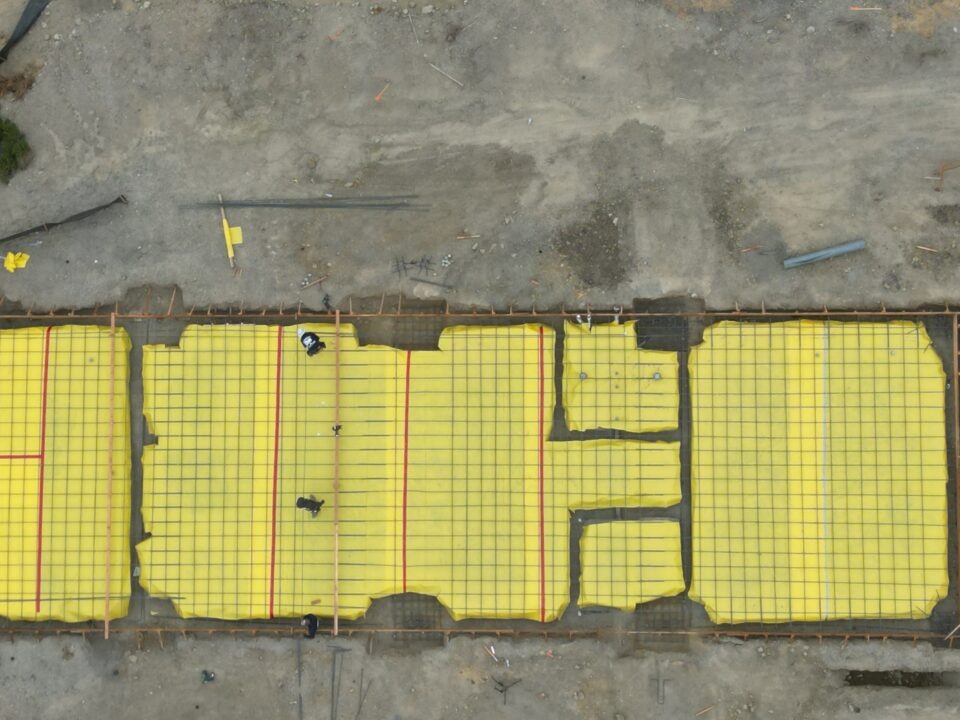
Forming, Vapor Barrier & Final Prep
Once the rebar was dialed in, we installed the yellow vapor barrier and made sure all penetrations, edges, and overlaps were sharp.
The forms were tight, appropriately braced, and ready for inspection. When we build it ourselves, everything fits together the way it should.
Concrete Day
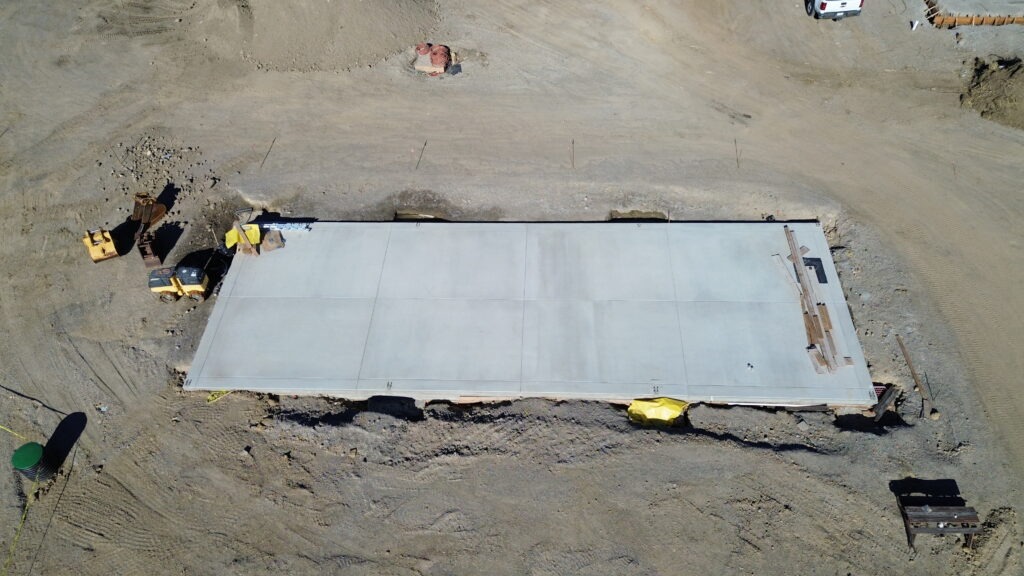
The concrete pour went smoothly. Good access. Good finish. No drama.
You’ll see the drone shots — clean slab, solid finish, everything in the right place.
This slab’s ready for steel whenever they’re ready to bring it in.
WHAT WE SEE IN THE FIELD vs. WHAT’S ON PAPER
Plans always look clean — straight lines, perfect squares, no surprises. But in the field, things shift, soil reacts, dimensions run long or short, and sometimes previous trades miss the mark.
On this Milpitas project, the carport slab we built posed no issues because we handled every step — layout, digging, forming, rebar, vapor barrier, and footings. Everything lined up.
But on the other slabs at the same property (the AG slab and the livestock slab), someone else framed them before we arrived. Looked fine at a glance, but once you start measuring, the problems become apparent. Things weren’t lining up, anchor points were off, elevations were inconsistent — all the stuff that turns into change orders.
This is why we prefer to do everything from the ground up. Fewer fixes, fewer backtracks, and the client gets exactly what the engineer designed. Our growth over the years comes from learning this the hard way — you stay in communication, you measure everything, and you don’t assume anything is “close enough.”
Schedule online ⏩ https://tinyurl.com/AllAccessEstimates
Call/text: 510-804-4646